Adding a New Project
This article is a go-to guide on setting up a brand new project in your Hopp installation. The starting point for this guide is a functioning Hopp installation. For guidance on installing and configuring Hopp, please refer to these articles:
Set Up a Project
Setting up a project includes going through these steps:
- Ensure that the necessary prerequisites are in place (project database, server definition, engines, and language)
- Create the Project in the Portal
- Configure the Runtime for the Project
- If you are not reusing an existing vacant track, you need to create a new track for the project to execute
- Set the project to use the track
Below we will go through these steps one by one.
Preparation
Before you can create the project, there are some things that must be in place first.
| Project Database | Before you can create the project, you need to create an associated Create a new database and run the Best practice naming for the project database is |
| Project Database Server | The |
| Engines | The |
| Language | A |
Create Project
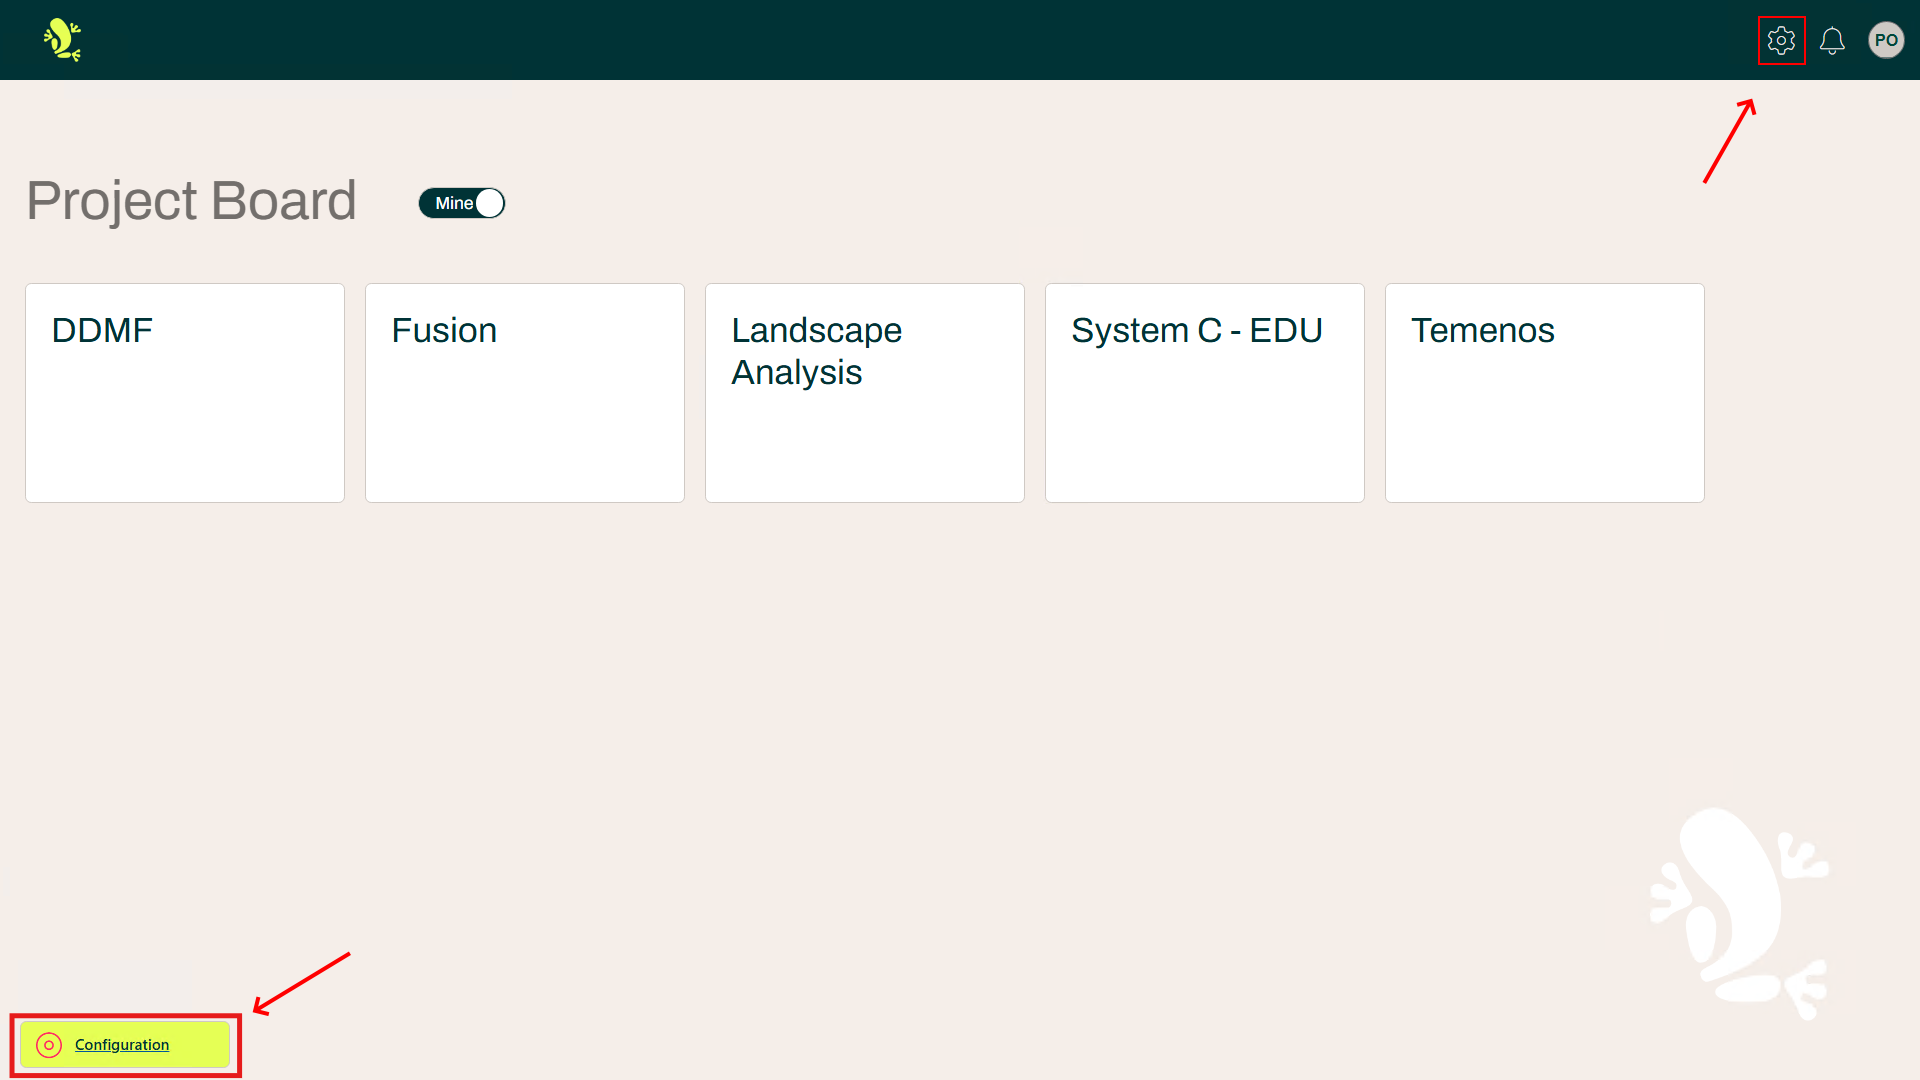
To Create a Project, you need to go to the Configuration section of the Portal.
Click the Configuration button visible on the Project Board or the gear button next to your profile picture.
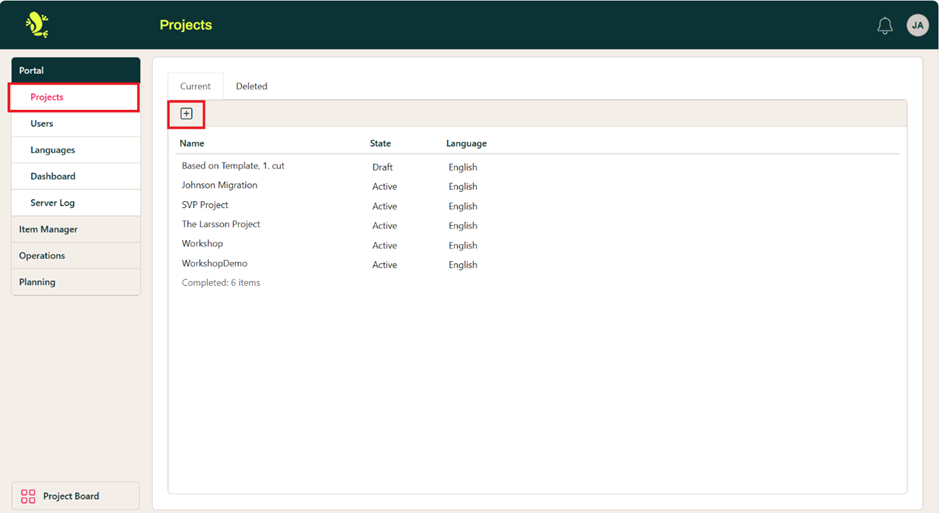
When the Configuration section is displayed, the Projects panel is by default displayed.
Click on the + button to create a new Project.
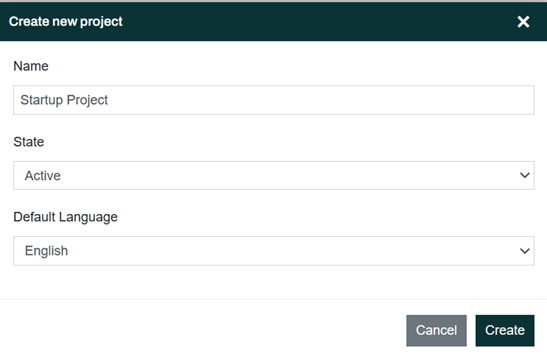
Give the project a name. In this example, we are using the name Startup Project. Set State to Active, and choose Default Language for the project
Then click the Create button.
Note that languages are created elsewhere in the Configuration section (see Preparation above).
Once the project is created, it shows up in the list of projects.
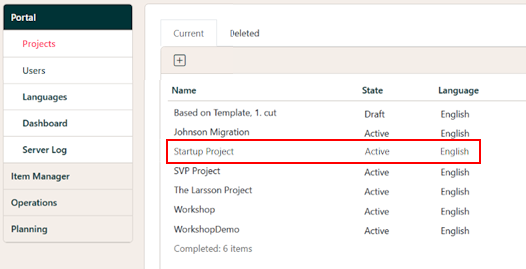
Click the newly created Startup Project in the project list to open project details.
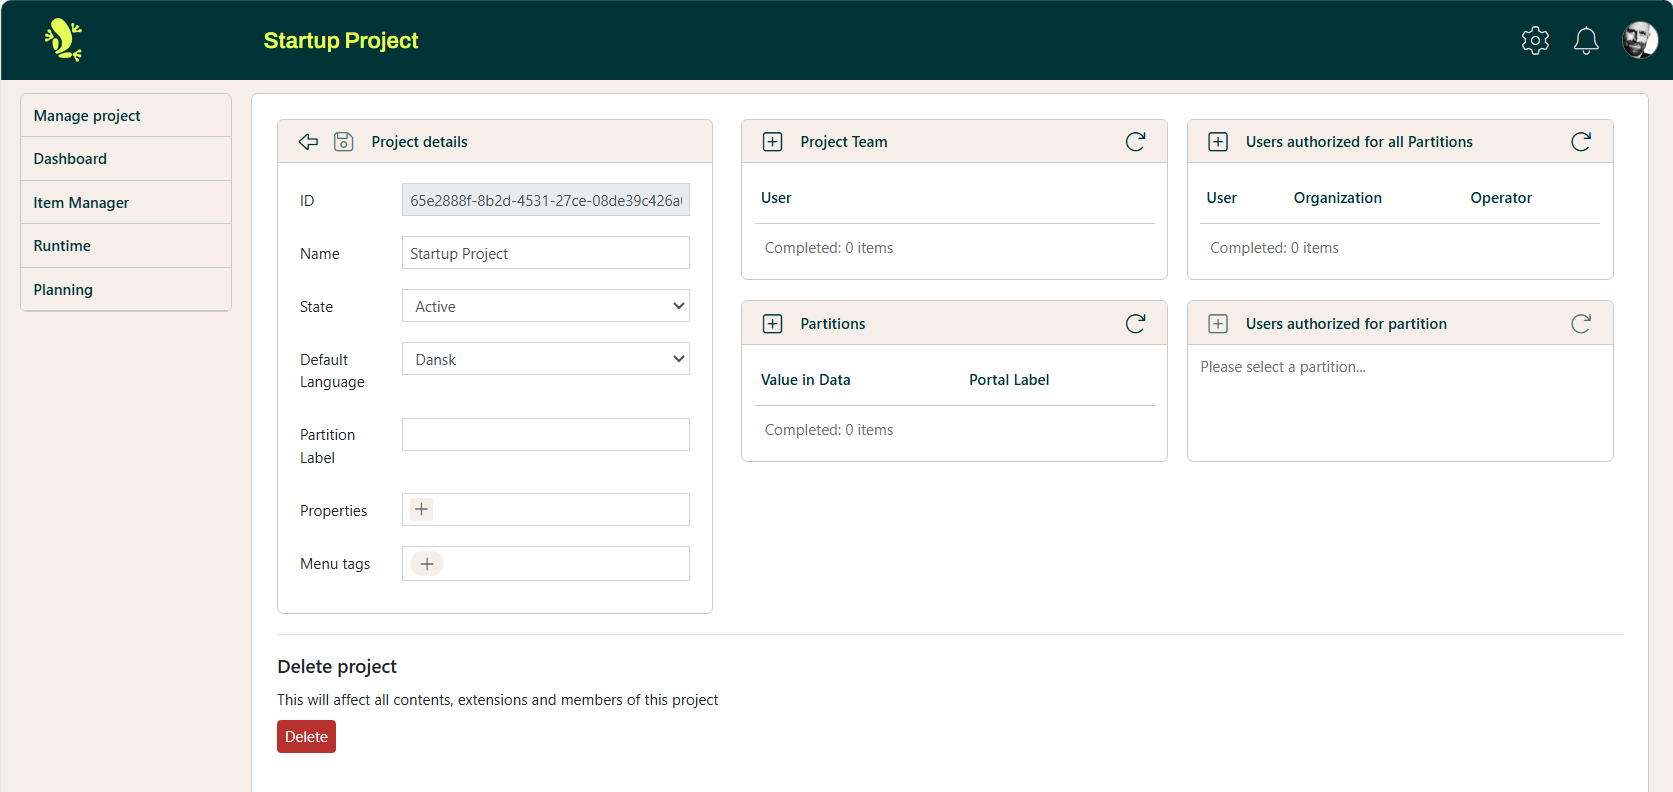
On a project, there are four sections:
- Manage Project
- Edit the project details here. For further information, please check these articles: Project - Authorization and Partitions.
- Dashboard
- You can override the installation-wide dashboard for the project here. Read more about dashboards: Portal Configuration
- Item Manager and Planning
- These are optional modules that can apply to a project if they are included and configured as part of your installation.
- Runtime
- This is the section we are interested in here. This is where you set up the Runtime for this project.
Runtime
Click the Runtime → Manage entry in the left-hand menu. For a brand-new project, the Portal will ask you to create a new runtime for the project:
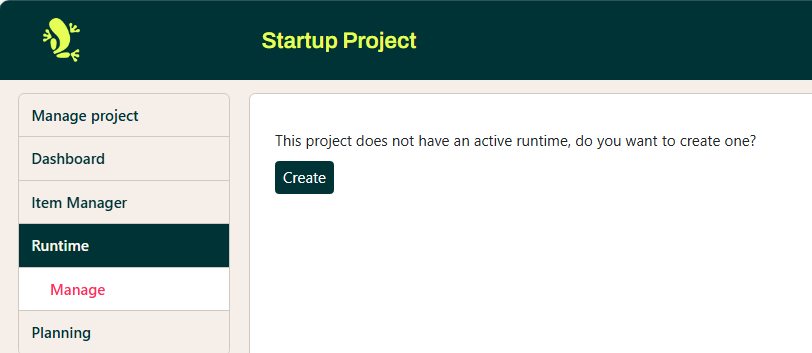
Click the Create button to create the Runtime. Now you can provide information on how and where to run the Project.
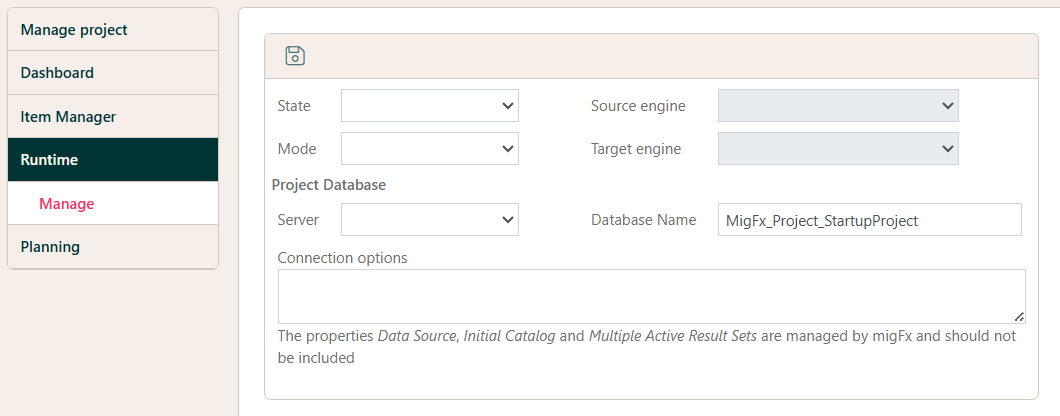
| State | Is the Project Runtime Active or Inactive |
| Mode |
|
| Source Engine | In either mode, a Source engine must be specified. Select one from the Dropdown of available Source engines. |
| Target Engine | If the mode is |
| Server | Select the server where the project database is created from the dropdown of available servers. |
| Database | Specify the Name of the Project Database created in the Preparation step. |
| Connection Properties | Advanced usage. Additional properties for the connection to the project database can be specified here. |
Set Up a Track
If you do not already have a vacant track that is not in use by any project, you have to create a new track. If you do have a vacant track, you can skip this part and go directly to Use the track below.
Preparation
When you create a Track, you need to attach a root folder, a Staging Database, and a Migration Database. If they don’t exist, you must create them first.
Root folder
On the server that is to be selected as the Execution Server for the Track, there must be a root folder with the Track number to be specified as path for the Track. If there are no available Root folders, you must create one.
For example:
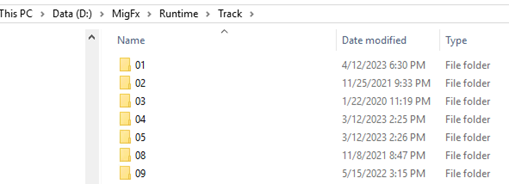
In the screenshot above, the root folder for each track is in the parent folder D:\MigFx\Runtime\Track.
This folder is normally configured as the Default Track Path for the server hosting these tracks. See Portal Configuration → Runtime
Track databases
The track needs two databases that must be created. If you have the necessary authority, you can create them yourself.
If not, you must ask whoever is responsible for the SQL Server instance to create the databases.
Be careful to place the database files in a location that adheres to the standard your Hopp installation follows. If the track number is part of the file path, be sure that it corresponds to the number for the track you are creating.
Migration Database
The Migration database for the track must be created. Best practice for naming the migration database is MigFx_XX_Migration or Hopp_XX_Migration,
where XX is the number of the track you are creating.
Once created, you must run a setup script to initialize the database. You can either
- download the
MigrationDb.Setup.sqlscript from the Hopp installation homepage for your version of Hopp - or you can use the Generate Scripts task in SQL Server Management Studio to generate a setup script from an existing migration database
Staging Database
The Staging Database is created as empty without content. All objects in this database are created and maintained by the Source Engine.
Create the Track
To create a track, you need to go to the Configuration section of the Portal, then choose Operations → Runtime → Track

Click on the + button to open the Add Track dialog.
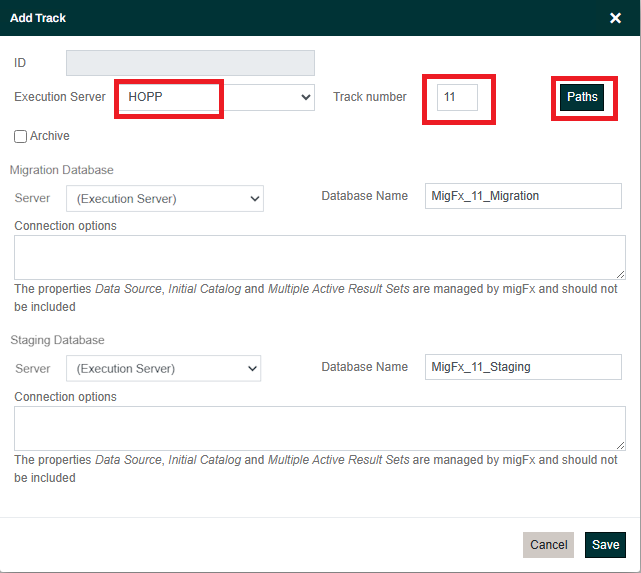
From the Execution Server dropdown, select the server to run the migration and type the track number you are assigning to this track.
If you created the migration and staging databases on the SQL Server instance on the execution server, you can leave the Server selection for the databases as (Execution Server). Otherwise, select the server on which you created the database from the respective dropdown.
The database names will be suggested — you can change these to match the names of the databases you created above.
Set folder paths
Click the Paths button to set up paths to the working folders used by this track.
In the Root Folder text box at the bottom of the window, verify it matches the path to the root folder you created above. If not, correct and click the Set Default button to apply the root folder to the paths above.
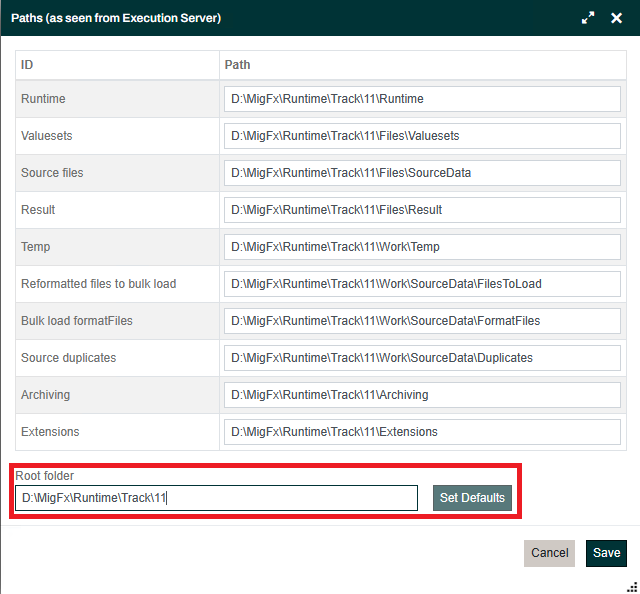
All the paths are as seen from the Execution Server. In the screenshot above, that means that D: is a local drive on the Execution Server itself
(or a mapped network drive).
You can specify UNC folder shares (starting with \\) here if you need the track to access folders on the network.
Be aware that the Hopp service account must have full control access to these shares.
Click Save in the Paths dialog and then Save in the Add Track dialog.
Use the Track
Now we need to set the Project to use the Track.
To do that, open the context menu for the track you want to connect to the project, then select Usage.

This opens the Track usage dialog.
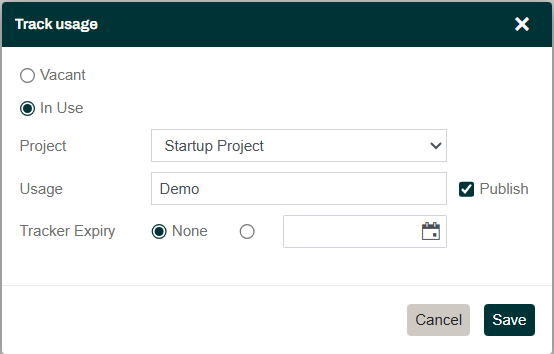
Select the Project you just created from the Project drop-down.
In the Usage field, provide a description of what the project is using this track for. This appears as the track’s identifier when users select it in Portal → Operations.

Check Publish to make the track visible in the Portal.
Click the Save button. You have finished creating a new project and track.