Setting up the Master Server
The Master Server is the first machine you set up, and the heart of a Hopp installation. It plays three roles:
- It runs the Hopp Portal, the web application your team signs in to, as a Windows Service.
- It hosts the central databases that hold the configuration and state shared across the installation.
- It serves that configuration to every Execution Server, which fetches it at startup.
Set it up first: nothing else can come online until it is in place.
Configure Folders
Recommended folder structure on Master Server
- D:\MigFx
- Database: Master, Repository and Portal database files here, and the Item Manager and Test ones if you use those modules
- Project: Project Database files here (when setting up a new migration project)
- Runtime: used when the Master Server also acts as an Execution Server. The Runtime Agent service account must have full
control of this folder; the Portal service account needs no access to it (see Accounts)
- Temp: the Runtime will use this folder for temporary files
- Database: Master, Repository and Portal database files here, and the Item Manager and Test ones if you use those modules
Create Databases
Install SQL Server following the prerequisites in the Installation Overview.
Note: Please ensure that all databases are created with the same SQL Server collation.
Hopp's databases are set up in three different ways:
| Databases | Set up by |
|---|---|
| Master, Repository, Utility, Project, Migration | the PowerShell database scripts in the dbscripts.zip download |
| Portal, Item Manager, Test | their own SQL setup scripts, in the same download |
| Staging | you create the database; Hopp maintains its schema |
The Master Server holds the Master, Repository and Portal databases, plus the Item Manager and Test databases if you use those modules. The Utility, Migration and Staging databases belong to the Execution Servers (see Setting up an Execution Server), and a Project database is created with each migration project.
This guide names a new installation's databases Hopp_<name>, for instance Hopp_Master. An installation upgraded from an earlier
release keeps the names it has, typically MigFx_<name>.
The Master and Repository Databases
Create the Hopp_Master and Hopp_Repository databases with the database scripts in the dbscripts.zip download:
-
Extract the download and unblock the extracted files, from a PowerShell prompt in the extracted folder. The scripts are not signed, so PowerShell refuses to run them while Windows still marks them as downloaded from the internet:
Get-ChildItem -Recurse | Unblock-File -
If you need a specific collation or file location (for instance the database files in
D:\MigFx\Database, as in the folder structure above), create the Master and Repository databases yourself first. Otherwise the command creates them with the server's default collation and file placement. -
Create and fill the Master and Repository databases from that folder, as the installing account (see Accounts):
./update-installation.ps1 -Server <server> -Mode Execute -AllowCreate -MasterDatabase Hopp_Master -RepositoryDb Hopp_Repository -RuntimeAgentUser DOMAIN\svc-hopp -PortalUser DOMAIN\svc-hoppBefore it changes anything, the command checks that you have the rights it needs and that the service-account logins exist (or that you can create them), and lists every problem at once. To see the command it will run for each database first, run it without
-Mode Execute.If your DBA reviews and runs every change to the database server, they can run the SQL themselves instead; see If Your DBA Runs the SQL.
-AllowCreate lets the command create the databases that do not exist yet; it fills the ones you created yourself.
-MasterDatabase and -RepositoryDb give the databases' names. Pass the same names, and -UtilityDb Hopp_Utility, to every later
update-installation.ps1 command on this installation.
-RuntimeAgentUser and -PortalUser name the accounts the Runtime Agent and the Portal services run as, and grant each of them
db_owner on the databases. The example uses one shared service account, DOMAIN\svc-hopp, for both; with separate accounts, pass
each one its own. Pass the same accounts whenever you apply database scripts, not only here. The rights the command needs and every
option are described in Upgrading the Databases.
The Portal, Item Manager and Test Databases
The setup scripts for these databases are in the same dbscripts.zip download.
- Create database
Hopp_Portaland run setup scriptMigFx.PortalDb.Setup.sql.
If you plan to install the Item Manager or Test modules, also create their databases now.
- Create database
Hopp_ItemMgrand run setup scriptMigFx.ItemMgrDb.Setup.sql. - Create database
Hopp_Planningand run setup scriptMigFx.PlanningDb.Setup.sql(the Test module's binaries and database carry the internalPlanningidentifier).
The Portal never creates or upgrades these tables itself: run the setup scripts before the Portal first starts, and again on every
upgrade (see Upgrading the Databases).
The setup scripts create the tables but grant no access. Give the Portal service account the db_owner role on each of these
databases yourself (see Granting db_owner by hand), after the
command above has run.
Install and Configure the Portal
With the folders and databases in place, you can install the Portal itself.
The Portal does not start serving its production site right away. The installer puts the
Portal in place and sets it up as the Hopp Portal Windows Service, but on first start
the service comes up in setup mode: it serves a one-time configuration wizard on the
server itself, over plain HTTP, and nothing else.
You walk that wizard to supply the configuration the Portal needs. It writes the configuration to disk, and only then does the Portal come up in production mode on the address your users will use.
The steps below follow the order you carry them out: install the Portal, walk the configuration wizard page by page, and sign in for the first time as the administrator you create along the way.
Install the Portal
Run Hopp.Portal.exe (the Portal installer) from the Hopp download page. The
installer first installs the runtimes the Portal needs, the .NET 10 Runtime and
the ASP.NET Core 10 Runtime, if they are not already present (downloading them on
demand). It then lays down the Portal MSI, registers the Hopp Portal Windows
Service under the chosen service account, and seeds an external configuration store
at %ProgramData%\HoppTech\Portal\.
After the standard Welcome and license screens, the installer walks through three Hopp-specific dialogs, then ends with the standard install-folder step.
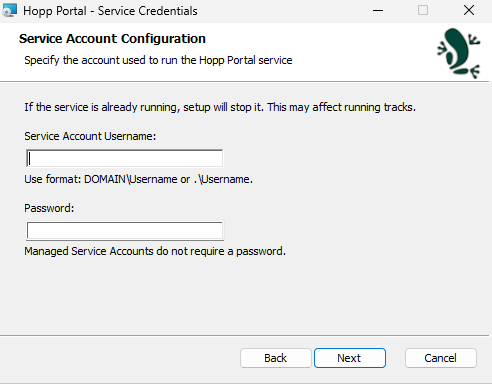
Service account
The Portal service runs under a dedicated Windows account. In a single-server setup this can be a local account. In a multi-server setup it must be an Active Directory account, or a Managed Service Account so there is no password to manage.
Specify the account in DOMAIN\User form. For a local account, use .\User (or the
machine name as the domain).
Use the Portal service account you passed as -PortalUser when you created the
databases; in this guide's examples it is the same account as the Runtime Agent's.
The account needs the db_owner role on the Portal database (and on the Item Manager
and Test databases if you use those modules), which you grant by hand (see
The Portal, Item Manager and Test Databases);
their tables come from the setup scripts, not from the Portal. The installer grants it
access to the Portal's own folder under %ProgramData%\HoppTech\Portal. It needs no
access to the Runtime folder. Accounts
lists everything each service account needs.
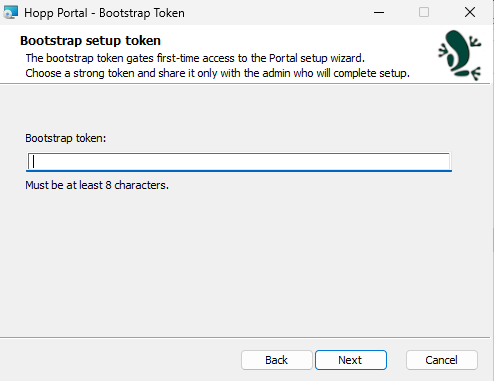
Bootstrap token
A secret you choose at install time. The web server asks for it the first time you reach the Portal in a browser, before it serves any setup page, so it gates first-time access to the wizard. Choose a strong value and keep a copy: it is not stored anywhere you can read back later.
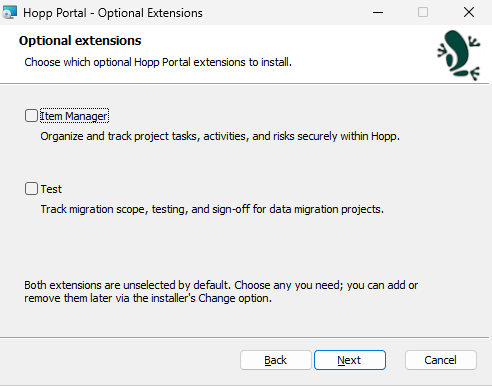
Optional extensions
Checkboxes for the Item Manager and Test modules. Selecting a module installs the files it needs on the server, and adds the module's configuration pages to the configuration wizard. You can leave both unchecked and add the modules later by running the installer again and choosing Change.
The installer supports silent install via Hopp.Portal.exe /quiet KEY=VALUE …. See Silent Install for the property reference.
Start the service
On its final screen the installer offers to start the Hopp Portal service. Start
it there, or start it later from the Services snap-in. On its first start the
service comes up in setup mode: it serves the configuration wizard locally over
plain HTTP, not HTTPS, at http://localhost:5000, and does not serve the
production Portal until you complete the wizard.
Walk the Configuration Wizard
Open http://localhost:5000 in a browser on the Master Server. The web server
asks for the bootstrap token you chose at install time before serving any
wizard page.
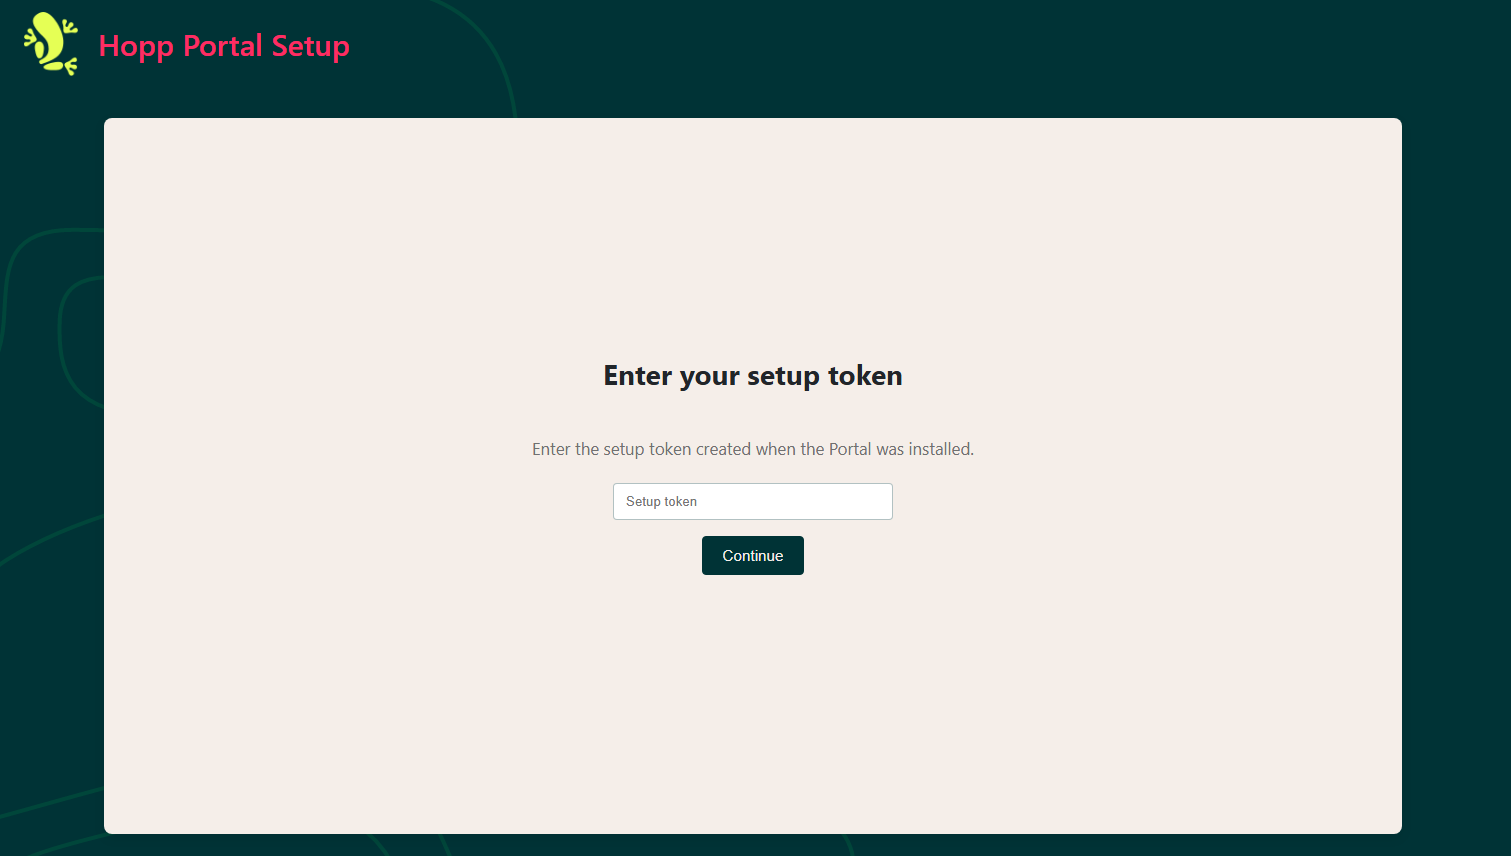
Once you enter the token, the Welcome page renders and the wizard walks you through the following pages, in order. Each page saves its own slice of the configuration when you click Continue.
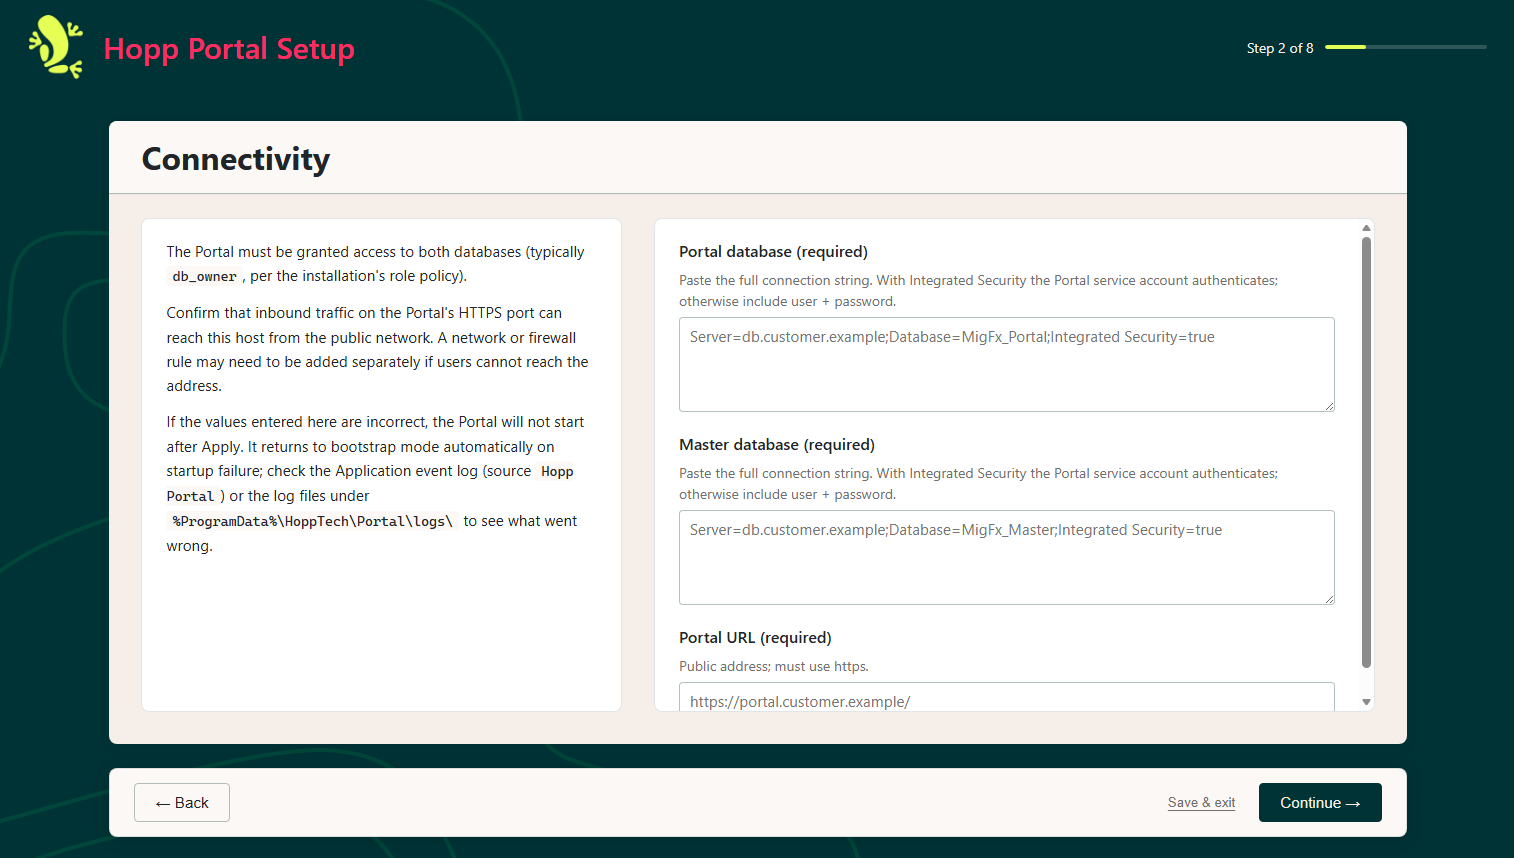
Connectivity
The connection strings for the Portal and Master databases (for instance Hopp_Portal and Hopp_Master), and the
public Portal URL that people type in their browsers to reach the Portal.
The Portal URL must be a real DNS name that the network can reach, not localhost.
The Portal reuses it as its own address: it goes into the HTTPS certificate when the
Portal serves HTTPS itself, and it identifies the Portal when it signs users in.
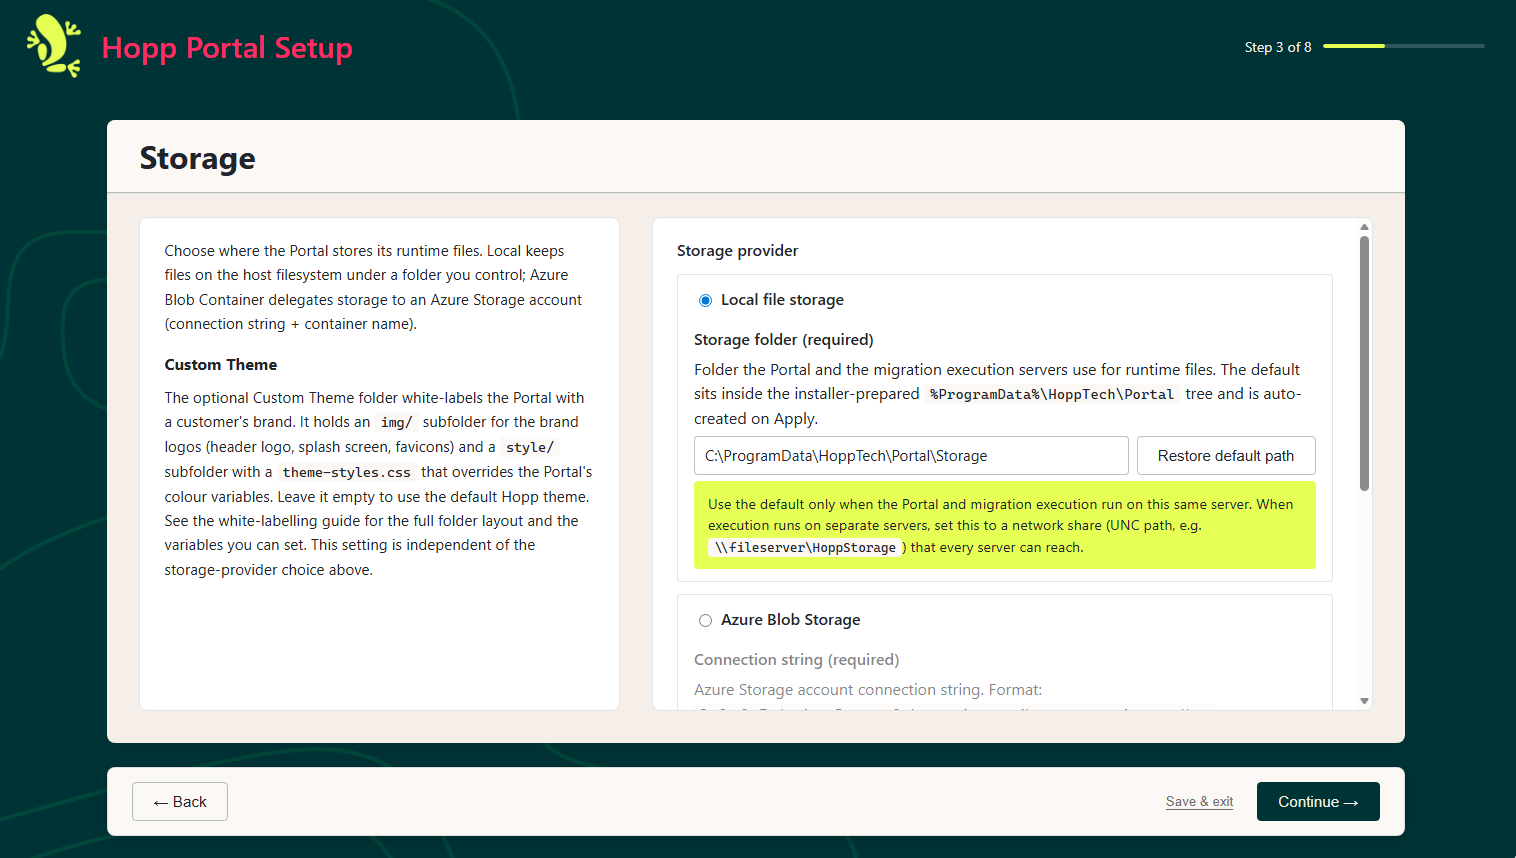
Storage
Where the Portal keeps its runtime files: a local path on the Master Server, or an Azure Blob container for a cloud deployment. The Runtime Agents read and write this folder too, so when Execution Servers are separate machines it must be a network share that both service accounts can fully access (see Accounts). You can also point to an optional custom theme folder here to white-label the Portal with your own branding. See White Labelling the Hopp Portal for the theme folder layout.
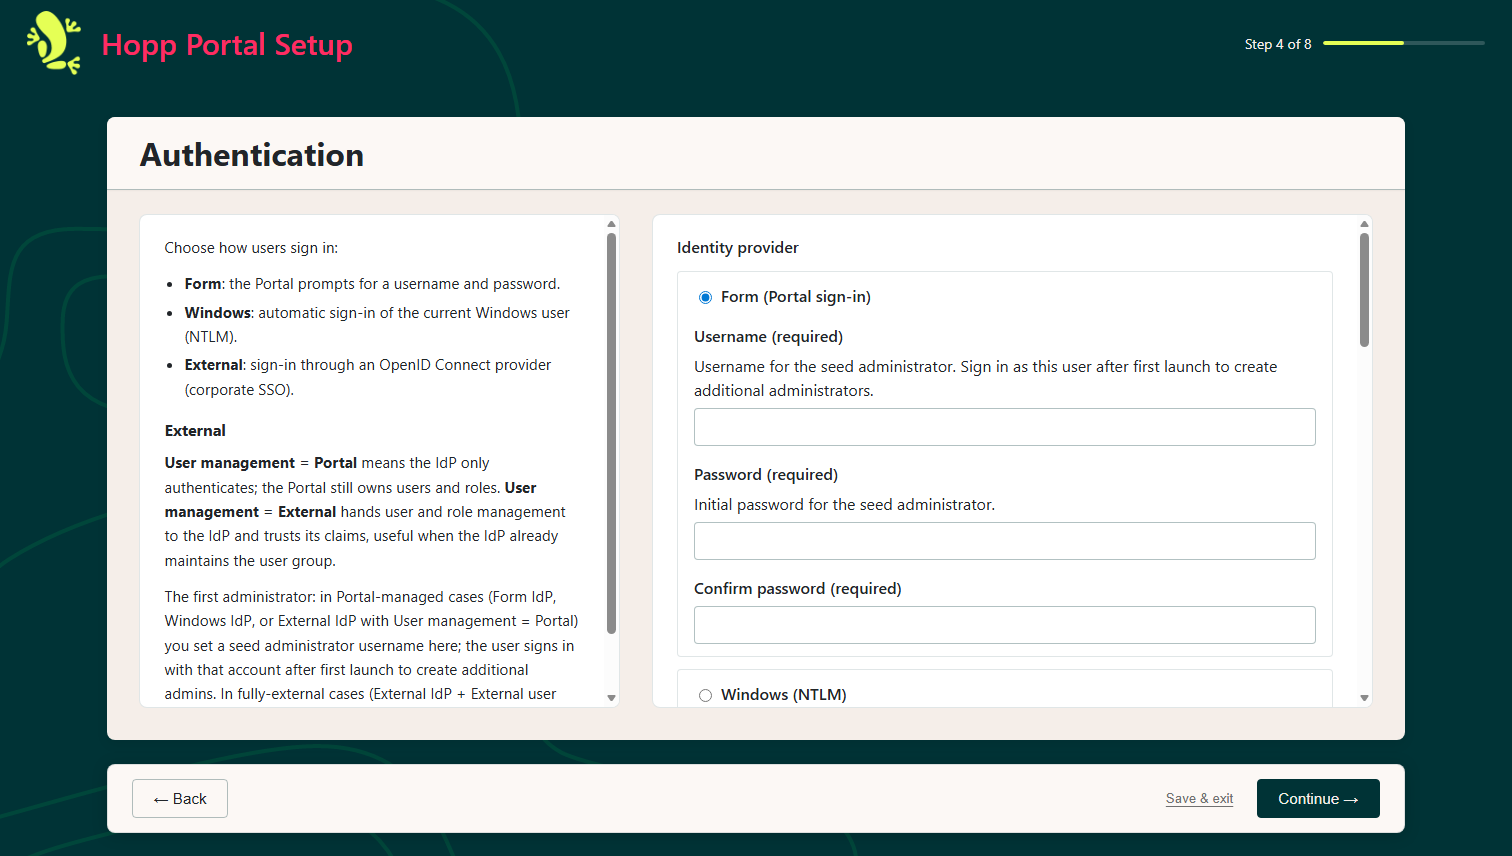
Authentication
The identity provider that signs users in: a local Form account, Windows integrated authentication, or an External OpenID Connect provider. For the External provider you also configure its OpenID Connect endpoints and client credentials here.
You can also set the seed administrator on this page. It is the first administrator account, created when the Portal first starts so that someone can sign in to an otherwise empty install. For Form you give it a user name and a password; for Windows or External you give the matching domain account or identity-provider user, with no password. The seed administrator has full administrator rights, and you use that first session to create the rest of the users.
The seed administrator is optional. Leave it blank if an administrator login already exists, for example when you reinstall, or when Windows or your identity provider already manages administrators. The Portal only seeds on first start and skips creation when the user already exists, so a seed administrator left in place just drifts from who actually has access.
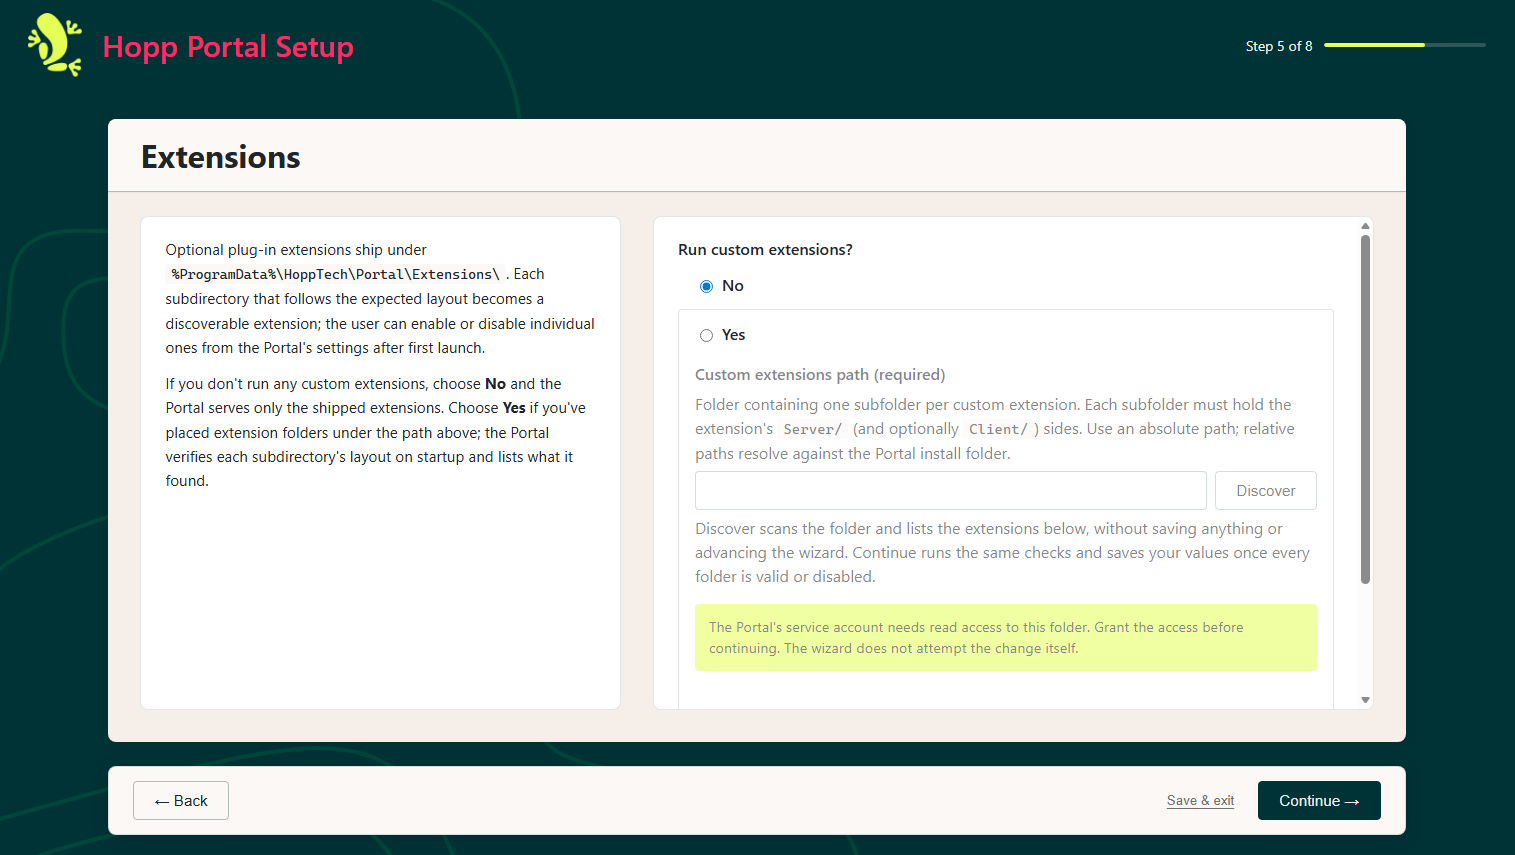
Extensions
Whether to load custom extensions developed outside Hopp, and the folder they live in. The shipped modules you selected at install time are always loaded and are not affected by this setting.
A custom extension can contribute its own wizard pages. When such an extension is loaded, its pages appear in this wizard along with the built-in ones, and you fill them in the same way; their settings are saved with the rest of the configuration when you click Apply.
HTTPS & Reverse Proxy
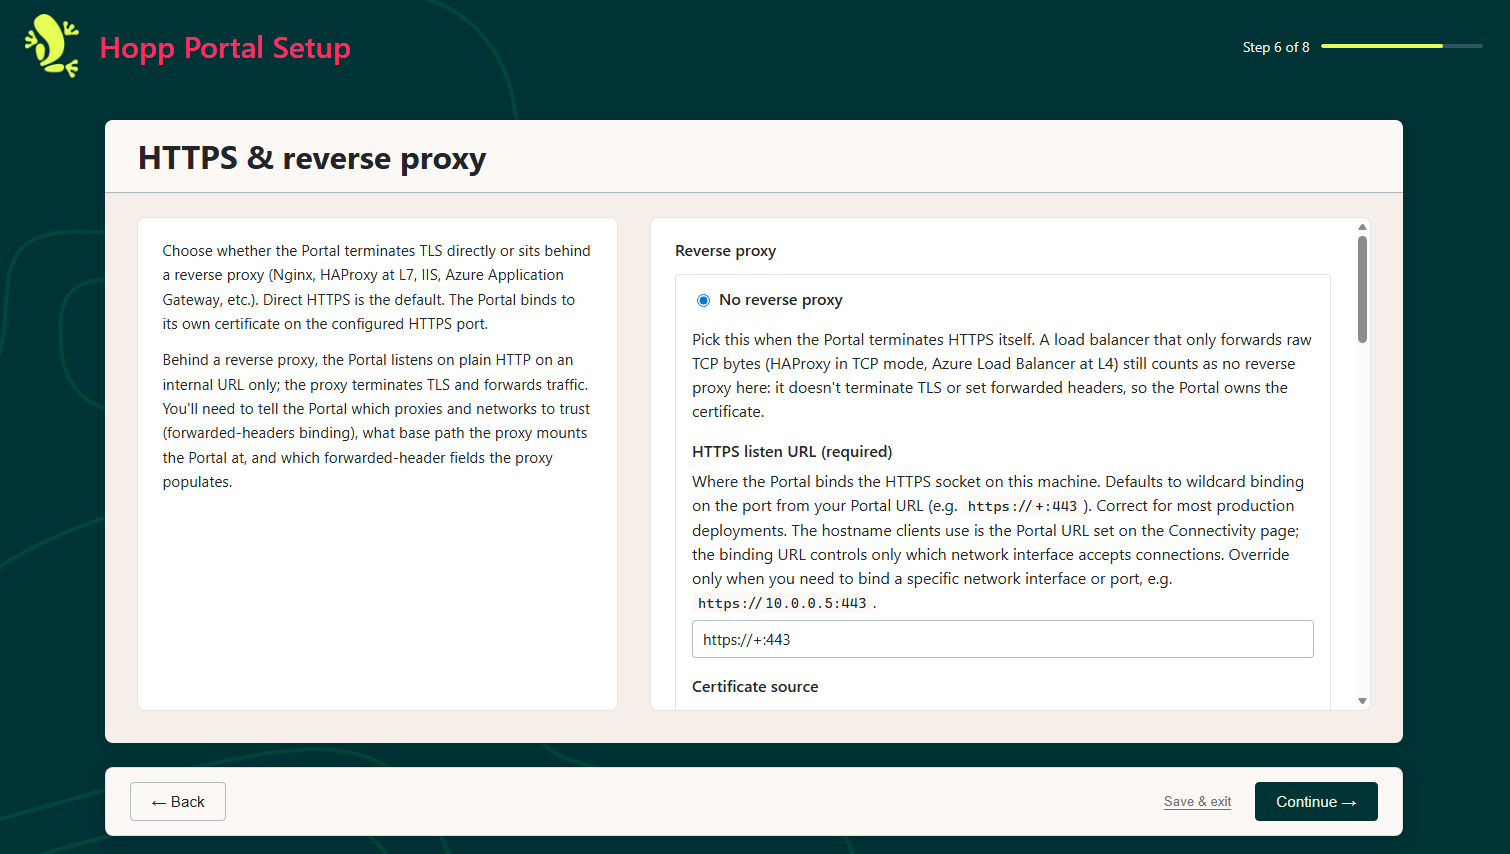
How the Portal is reached over the network. Either a reverse proxy fronts it, in which case the Portal listens on plain HTTP internally and trusts the proxy's forwarded headers, or the Portal terminates HTTPS itself, in which case you pick the certificate source: self-signed, the Windows certificate store, or a PFX file.
The Portal loads faster over HTTP/2. When the Portal handles HTTPS itself, HTTP/2 is
on by default. Behind a reverse proxy, enable HTTP/2 on the proxy's HTTPS side and
keep the proxy's connection to the Portal on HTTP/1.1, the only protocol the Portal
accepts there. The browser's developer tools show h2 in the Network tab's
Protocol column when HTTP/2 is in use.
Request Limits
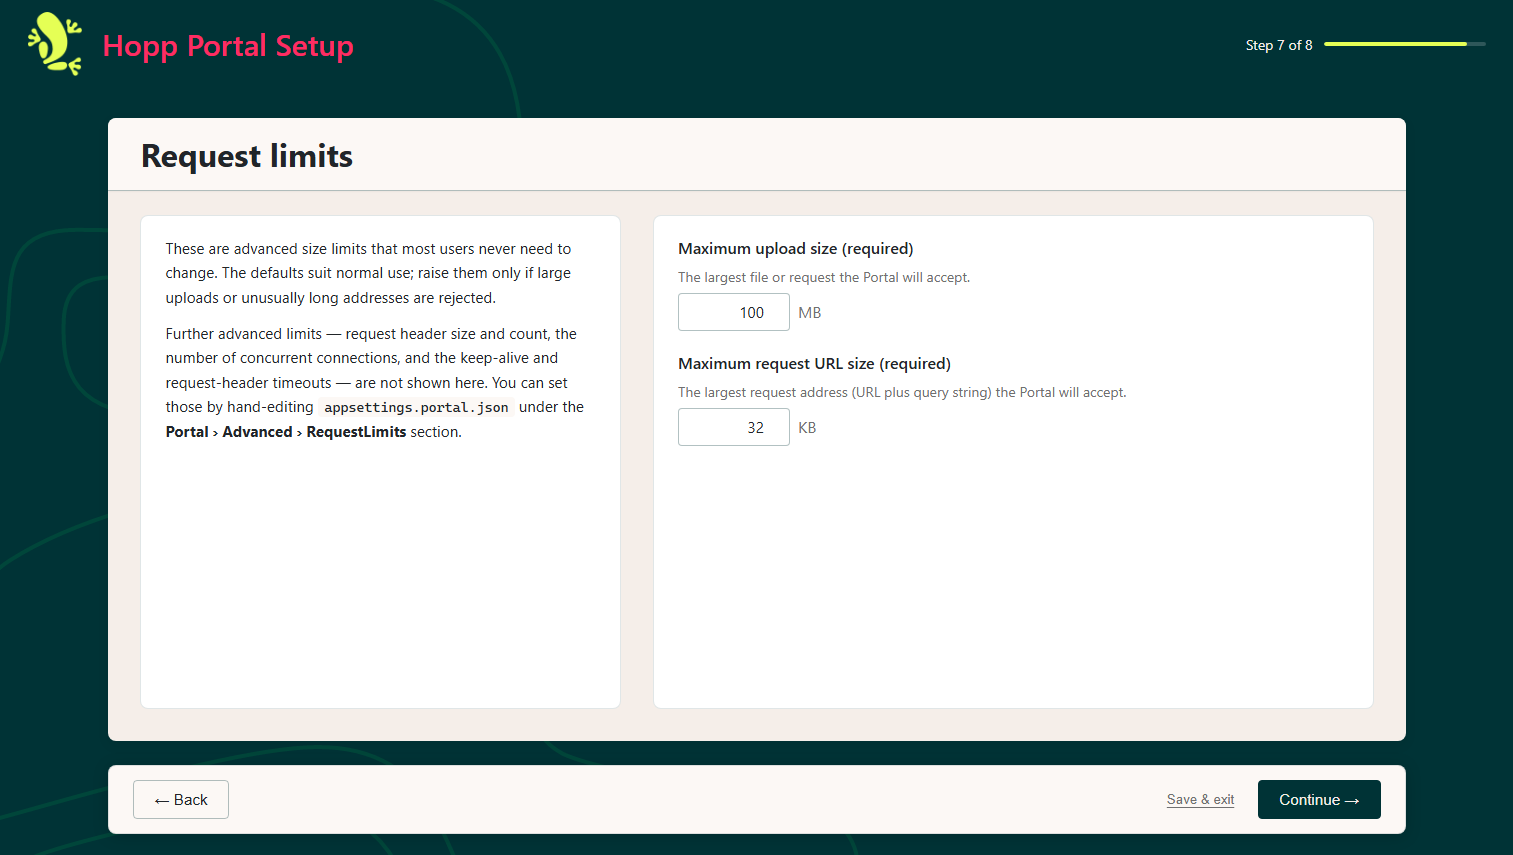
The largest request body and web address the Portal will accept. Raise the defaults of 100 MB body and 32 KB URL if you expect very large uploads or unusually long web addresses.
Review
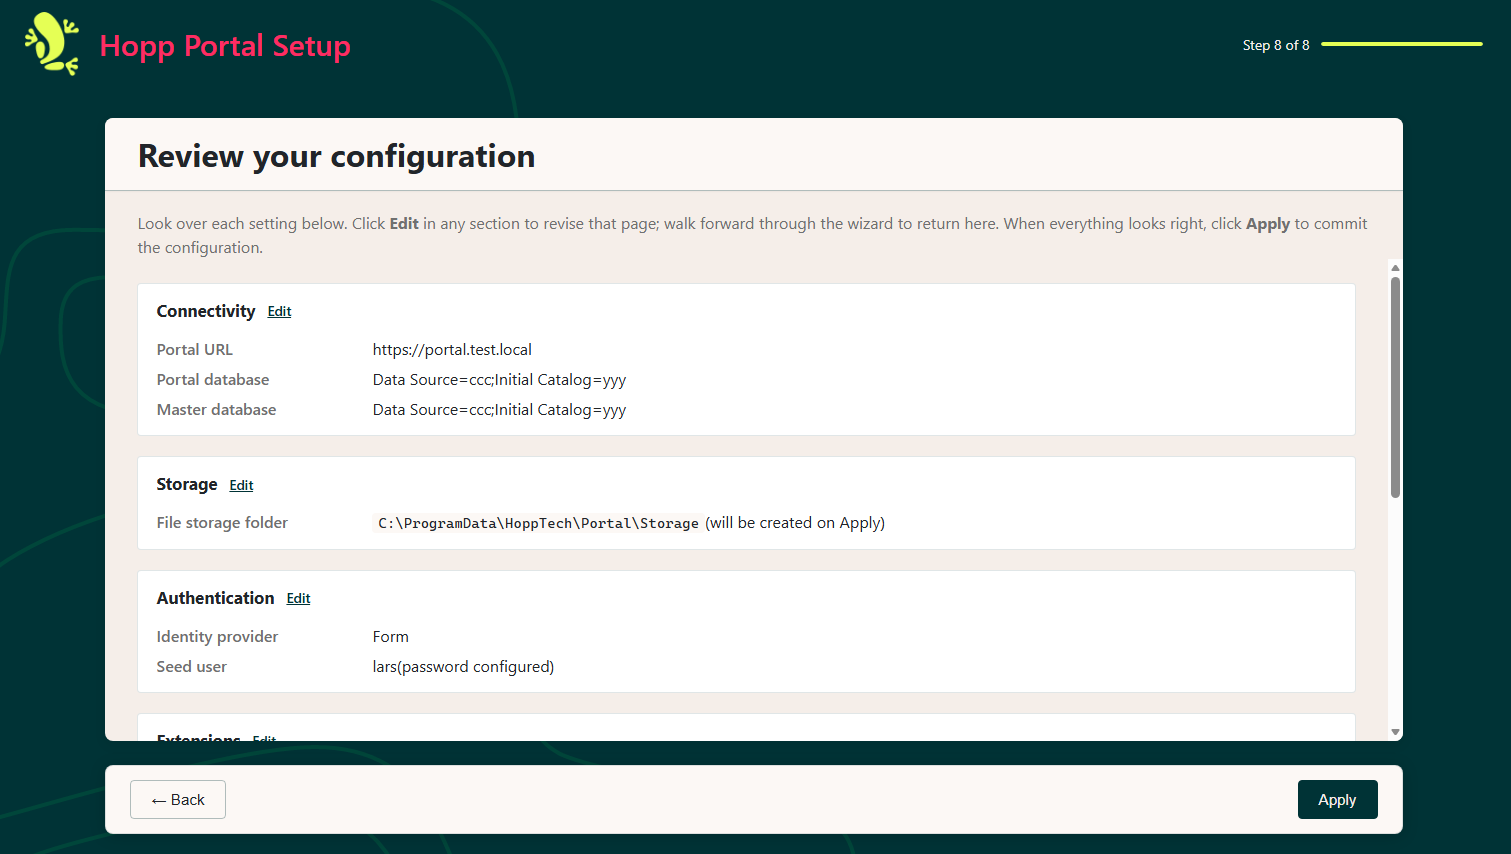
A summary of every value you entered. Click Apply to write the configuration and leave setup mode.
Restart into production mode
When you click Apply, the Portal writes its configuration to
appsettings.portal.json and switches out of setup mode, then asks you to
restart the service.
Restart the Hopp Portal Windows Service from the Services snap-in so the new
configuration takes effect. On the next start the Portal comes up in production
mode on the Portal URL you configured.
If the Portal does not start
Until the Portal has started once in production mode with the configuration you
applied, a failed start does not leave the service down. The startup self-check
catches the failure, records the error, and the service falls back to setup mode,
serving the wizard again at http://localhost:5000. The wizard's Welcome page shows
the recorded error so you can see what went wrong.
Common causes are values that pass the wizard's own checks but only fail at runtime: a certificate that cannot be loaded, a connection string that points at an unreachable or wrong database, or a reverse-proxy setting that does not match the real network. Re-open the wizard, which is pre-filled with the values you applied, correct the offending field, click Apply, and restart the service. The Portal repeats this loop until it starts cleanly in production mode.
Once that configuration has started cleanly, a later failure no longer returns the
Portal to setup mode. If the Portal or Master database cannot be reached, the Portal first
waits for it, for up to 15 minutes by default; then the service stops, Windows restarts it, and each restart
fails the same way until the cause is fixed. The error is recorded as
Bootstrap.LastStartupError in %ProgramData%\HoppTech\Portal\bootstrap.json, and in
the Portal's log files under %ProgramData%\HoppTech\Portal\logs. Fix the cause and start
the service; to get back to the wizard instead, set Bootstrap.Mode to active in
bootstrap.json and start the service. A configuration the Portal finds incomplete still returns
it to setup mode by itself.
First Sign-in
Browse to the Portal URL you set on the Connectivity page and sign in as the seed administrator you defined on the Authentication step.
Use that first session to create the other administrator accounts and to upload the Hopp Runtime (see below).
Token signing certificate
When someone signs in, the Portal issues them a security token (a JSON Web Token) and signs it with a certificate, so the token cannot be tampered with. The Portal checks that signature on every request the user makes.
By default the Portal generates this signing certificate itself the first time it
starts, and keeps it on disk at %ProgramData%\HoppTech\Portal\signing.pfx. Because it
keeps the certificate rather than making a new one each time, signed-in users stay
signed in across Portal restarts and upgrades. You do not need to set anything up.
If your organization's policy requires the Portal to use a certificate that it manages
instead, you can override the default by setting the SigningCertificate block in
appsettings.portal.json. See Advanced: Manual configuration.
Upload the Runtime Libraries
Once the Portal is up and running in production mode, download
Hopp.Runtime.Libraries.zip from the Hopp download page and upload it to the Portal
(Configuration → Operations → Runtime → Runtime Libraries).
The Portal keeps the uploaded Runtime Libraries in its configured FileStorage, so
every Execution Server can fetch the matching version when it needs it.
Advanced: Manual configuration
This section is for advanced use. Most configuration is set through the configuration wizard and changed later by re-running it (Reconfigure, described below). Hand-editing the file, described here, is for settings the wizard does not surface or for scripted changes.
The wizard writes its settings to
%ProgramData%\HoppTech\Portal\appsettings.portal.json, and this is the same file you
edit by hand. Its values override the matching ones in the Portal's own
appsettings.json in the install folder, so you edit this file and leave that one
alone.
appsettings.portal.json belongs to you, not the installer. The Portal installer
creates it on first install only. A repair or an upgrade install never overwrites or
resets it. Your configuration and any hand edits carry across version updates. You
change it only by re-running the configuration wizard or by editing it yourself.
The file ships with an inline comment on every setting that explains what it does. Settings you supply ship commented out as examples for you to fill in (the wizard writes them when you click Apply); settings that have a safe default, such as the certificate source and the request limits, ship uncommented.
To change the configuration, open the file on the Master Server, read the comment above the setting you want, then uncomment its line and edit the value. The Portal picks up the change the next time the service starts. The Portal reads this file rather than this guide, so the file itself is always the current reference for the full set of settings.
To re-walk the wizard with your current values already filled in, sign in to the
Portal as an administrator and choose Reconfigure under System settings. You can
enter a new bootstrap token there, or leave it blank to keep the current one. Click
Reconfigure, then restart the Hopp Portal service (Restart-Service HoppPortal): on that start the
Portal comes up in setup mode and shows the wizard on its Welcome page, at
http://localhost:5000 on the server, filled in with your current values.