Setting up Notification and Email
The Portal can notify users about changes to the items and events they follow. It can show the notification inside the Portal and also send it as email.
You manage the message templates and the email relay inside the Portal, under Configuration > System > Notifications. The templates live in the Portal database, and a new install comes with a working default for each one.
What triggers a notification
The Portal raises a notification for these actions on an item or event a user follows:
- a followed item changes
- the user is assigned to an item
- the user is set as the owner of an item
- an item is created and auto-subscribed to the user by their subscription options
- the user is set as the anchor of an event
- the user is set as the delegate of an event
In-app notifications are always available. Email is sent only once the SMTP relay is configured. Until then the Portal still records the in-app notifications and does not fail.
Manage notification templates
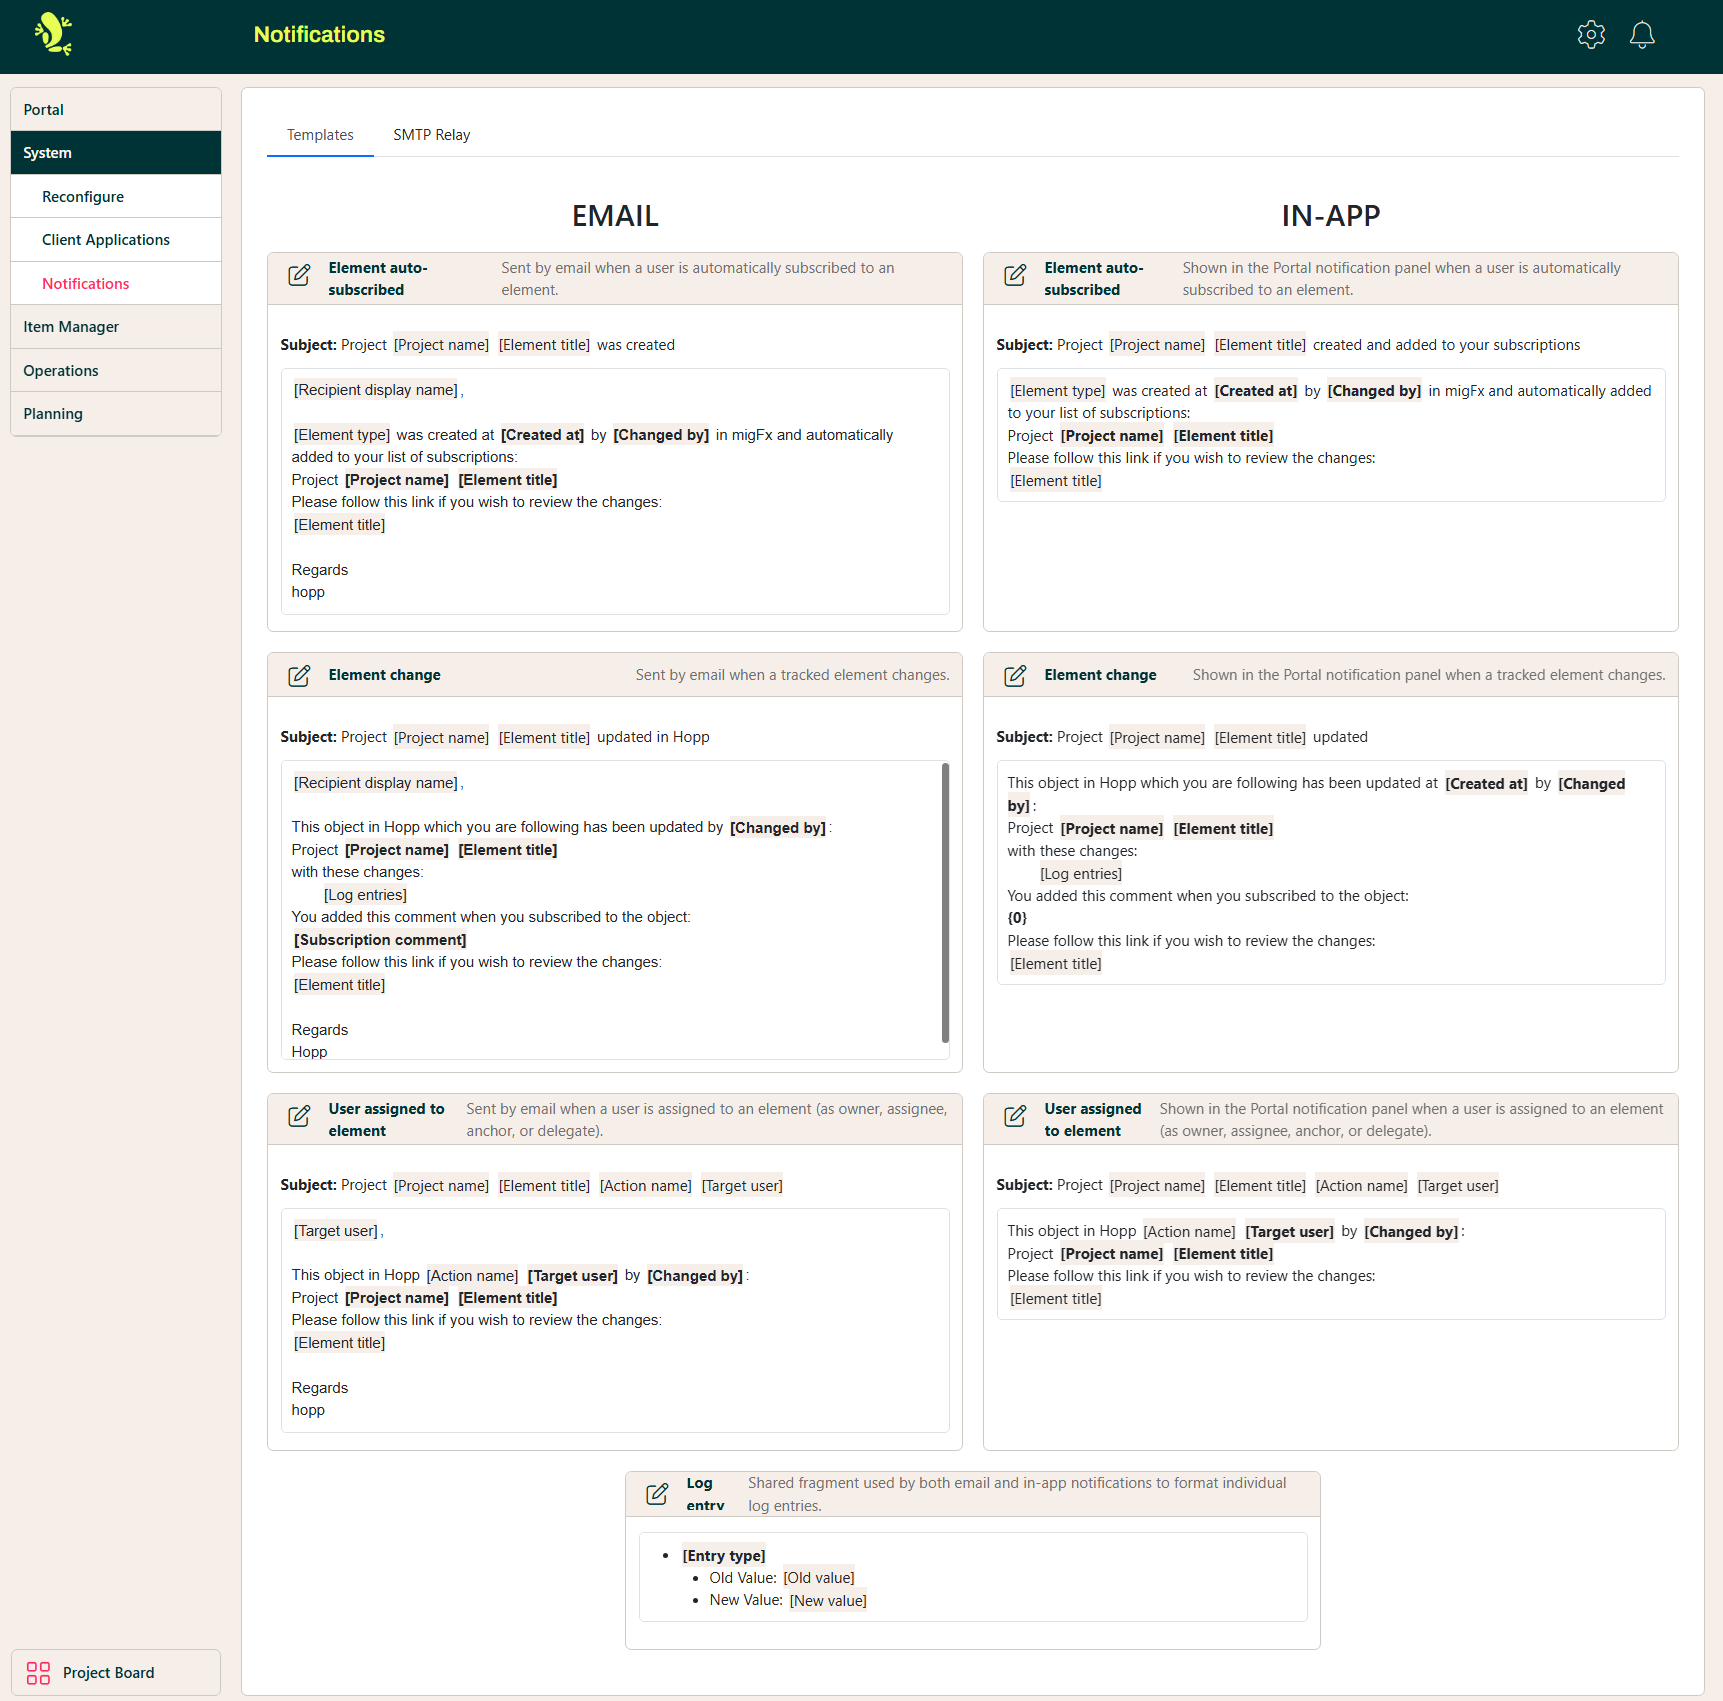
Open Configuration > System > Notifications and select the Templates tab. The templates are shown as tiles, in two columns: one for the in-app message and one for the email. A shared log-entry template sits at the bottom.
Each tile shows the template name, a short note on what it is for, the email subject (email templates only), and a preview with the placeholders filled in by sample values.
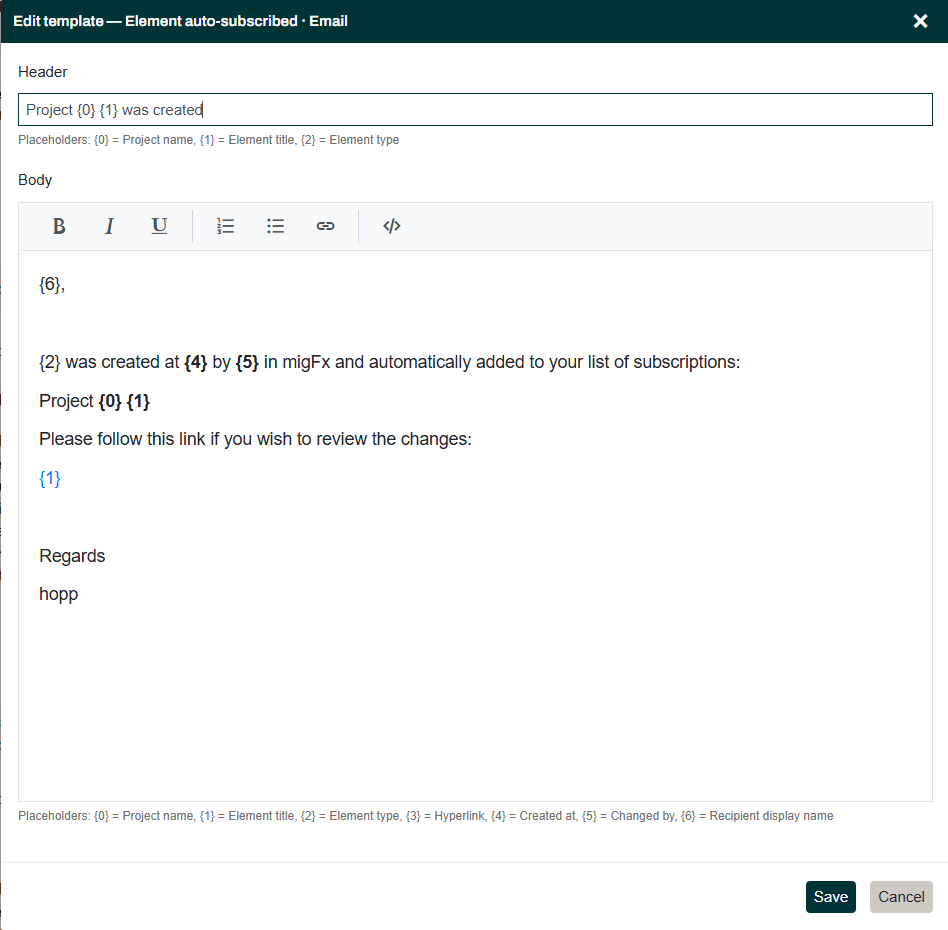
To edit a template, open its tile. The body opens in a rich-text editor: use the toolbar to format it, or switch to the source view to edit the HTML directly. Saving stores the change and refreshes the tile preview.
Templates are shown to users as formatted HTML, so only Portal administrators can edit them.
The templates
There are three message types, each with an in-app and an email template, plus one shared log-entry template:
- Element change: sent when a followed item changes.
- User set to element: sent when a user is set as the owner, assignee, anchor, or delegate of an item or event. One template covers all four, with the action named in the text.
- Element auto-subscribed: sent when an item is created and auto-subscribed to the user.
- Log entry: a single change line, reused inside the element-change templates to render each field that changed.
Template placeholders
Each template is HTML with numbered placeholders written as {0}, {1}, and so on,
which the Portal fills in when it sends the notification. The editor preview shows
them filled with sample values. For example, the log-entry template renders each
changed field as a list item:
<li><b>{0}</b><ul><li>Old value: {1}</li><li>New value: {2}</li></ul></li>
The placeholders for each template are:
Log entry
Reused by both element-change templates, one per changed field (3 placeholders):
{0}changed field{1}previous value{2}current value
In-app: Element change
- Title (2):
{0}project name,{1}item identifier and title. - Content (6):
{0}project name,{1}item identifier and title,{2}change log (one Log entry per changed field),{3}item link,{4}time of change,{5}changed-by user name.
In-app: User set to element
- Title (4):
{0}project name,{1}item identifier and title,{2}target user name,{3}action ("changed owner to", "was assigned to", "changed anchor to", "changed delegate to"). - Content (6):
{0}project name,{1}item identifier and title,{2}target user name,{3}changed-by user name,{4}item link,{5}action.
In-app: Element auto-subscribed
- Title (3):
{0}project name,{1}item identifier and title,{2}item type. - Content (6):
{0}project name,{1}item identifier and title,{2}item type,{3}item link,{4}time of change,{5}changed-by user name.
Email: Element change
- Subject (2):
{0}project name,{1}item identifier and title. - Body (7):
{0}subscribed user name,{1}project name,{2}item identifier and title,{3}change log,{4}item subscription comment,{5}item link,{6}changed-by user name.
Email: User set to element
- Subject (4):
{0}project name,{1}item identifier and title,{2}target user name,{3}action. - Body (6):
{0}project name,{1}item identifier and title,{2}target user name,{3}changed-by user name,{4}item link,{5}action.
Email: Element auto-subscribed
- Subject (3):
{0}project name,{1}item identifier and title,{2}item type. - Body (7):
{0}project name,{1}item identifier and title,{2}item type,{3}item link,{4}time of change,{5}changed-by user name,{6}subscribed user name.
Configure the email relay
To send email, the Portal needs an SMTP relay. On the Notifications page, select the SMTP Relay tab and fill in the server details. Until it is configured the tab shows a "SMTP relay is not configured" banner and the Portal sends no email; it still records the in-app notifications and does not fail.
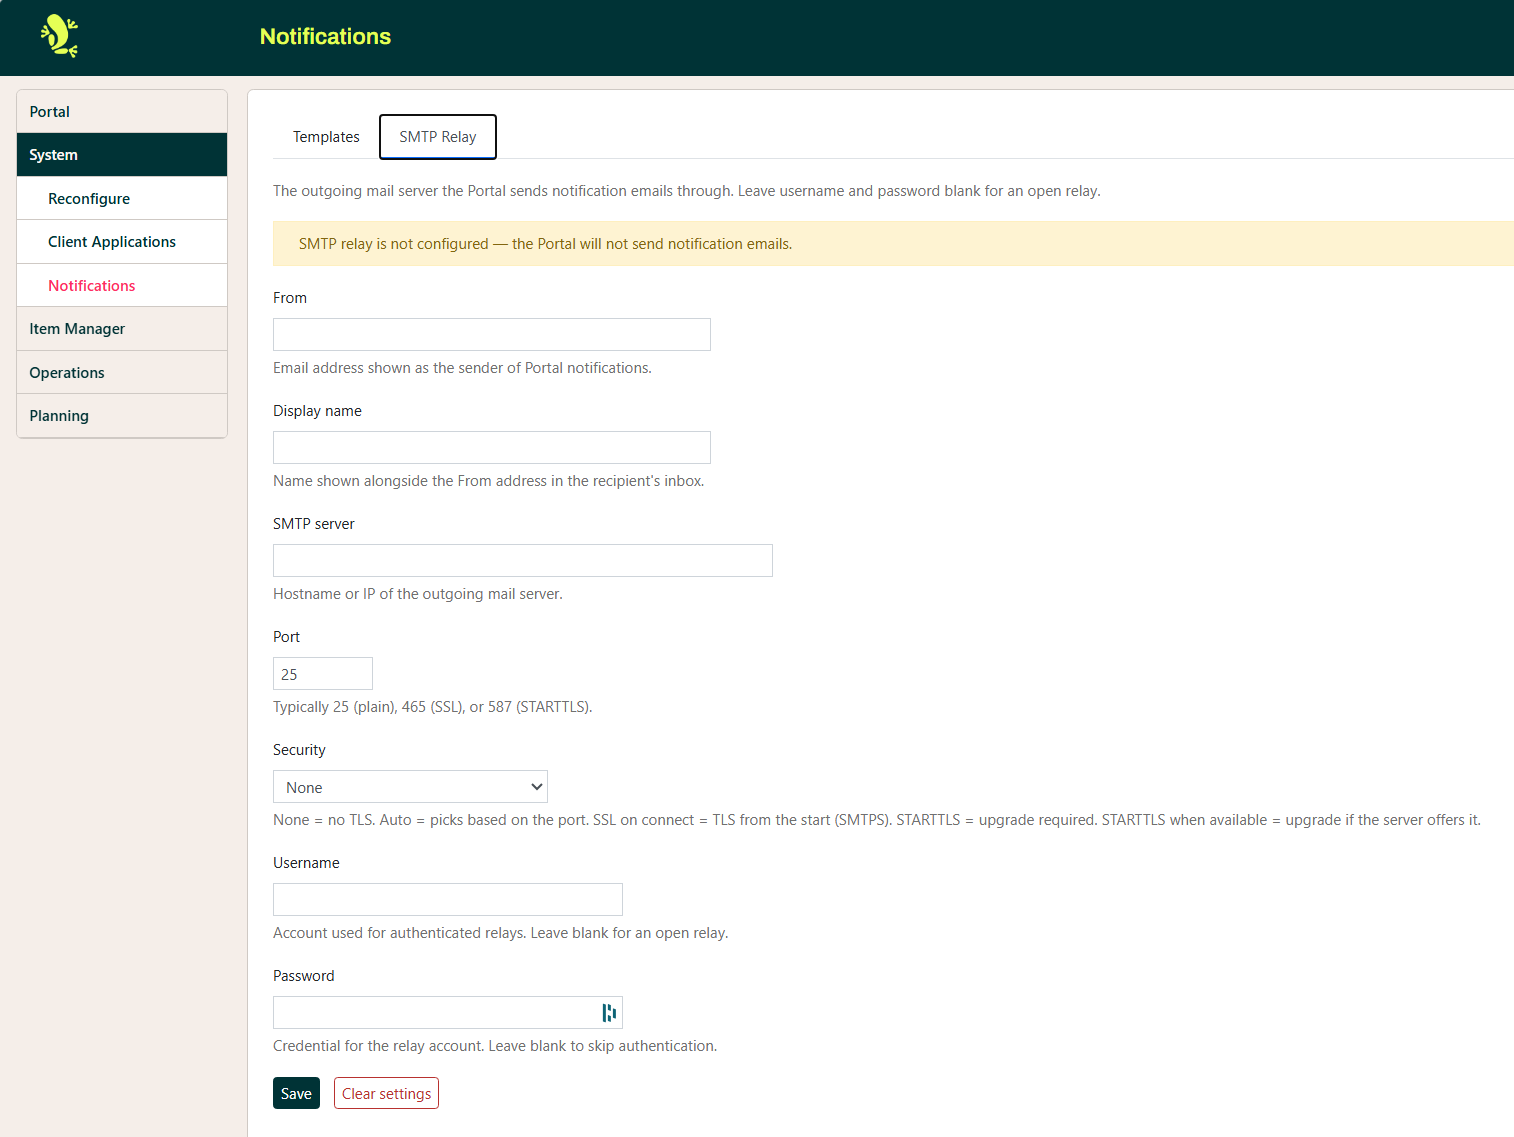
The settings are:
- From: the sender address on outgoing email. Use a dedicated Hopp mailbox.
- Display name: the friendly sender name shown to recipients.
- SMTP server: the relay host, for instance
smtp.office365.com. - Port: the relay port, for instance 587.
- Security: how the connection is encrypted: None, Auto (picked from the port), SSL on connect, STARTTLS, or STARTTLS when available.
- Username and Password: the credentials used to authenticate to the relay. Supply both to authenticate, or leave both empty to send through a relay that does not require credentials. Once a password is saved, the field stays empty: leave it empty to keep the saved password (also when you change the user name), or tick Clear stored password to remove it.
Saving checks the entries and confirms with a message. Clearing the settings returns the tab to the "not configured" state.